On Monday, January 18, we will be rolling out the much anticipated second installment of our enhancements to the Nextpoint import experience with the introduction of a load file mapper for produced data imports.
This update (phase 2 of 3) makes it simple to take any DAT or CSV load file received alongside a produced data set, select it for your import, and subsequently match the load file source fields to the appropriate destination fields in your database. If the desired destination database field isn’t available, you can also create new fields ‘on the fly’, all while in the load file mapper interface.
Smarter Load File Recognition
Over the course of the past several months, we have spoken with our users in hopes of gaining a deeper understanding of the complexities you face when importing. In doing so, one of the immediate realizations we had was the need to eliminate the extra steps required to convert load files from DAT to CSV when importing produced data.
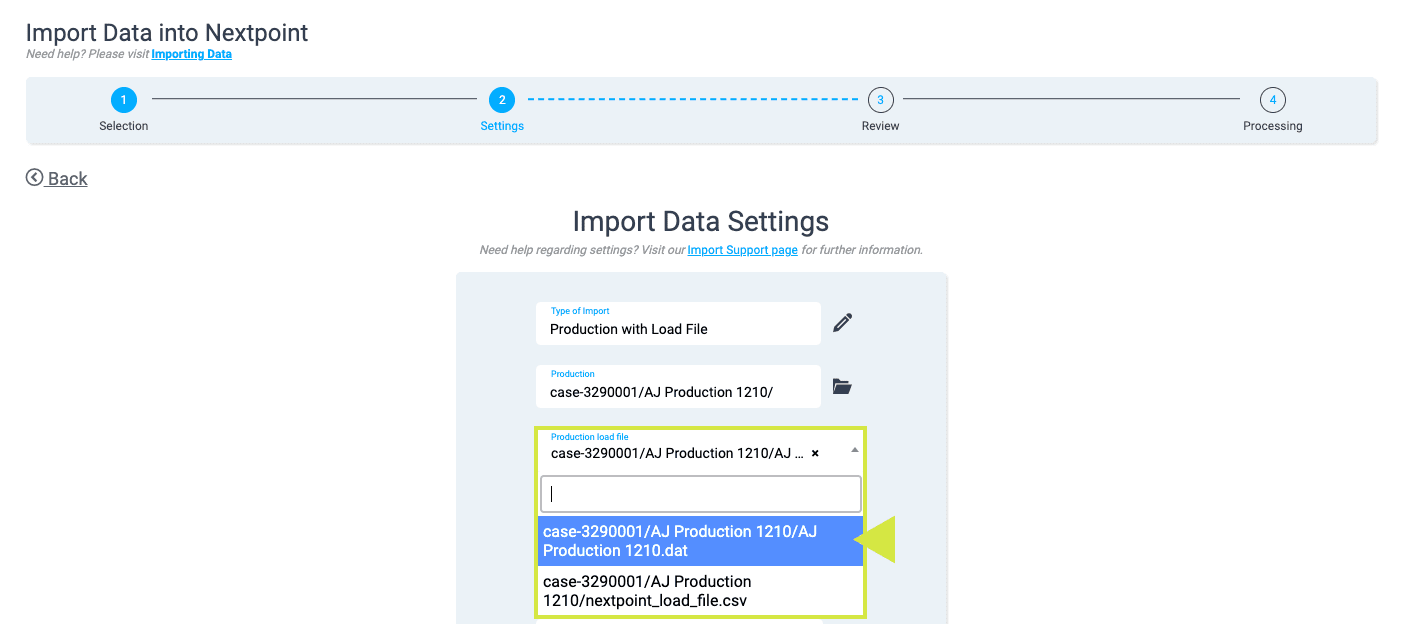
With this release, you can now upload a .DAT or .CSV load file with your produced data set, named to your liking. Once in Step 2 (Import Data Settings) of the guided import workflow, Nextpoint will recognize any load file in the root of your production folder, and will suggest such for use during import. If there are multiple load files in your production data set, you will be provided the opportunity to select a different load file. Once confirmed, Nextpoint will read your selected load file for field mapping in Step 3 of the import workflow.

Note: With this initial release of phase 2, the load file will still need to be located in the root path of your production data set, but in forthcoming updates, you will be able to leave the load file in the DATA folder.
Field Mapping Made Easy
The perfect way to kick off the New Year is with a much anticipated addition to the Nextpoint import experience – the load file mapper.
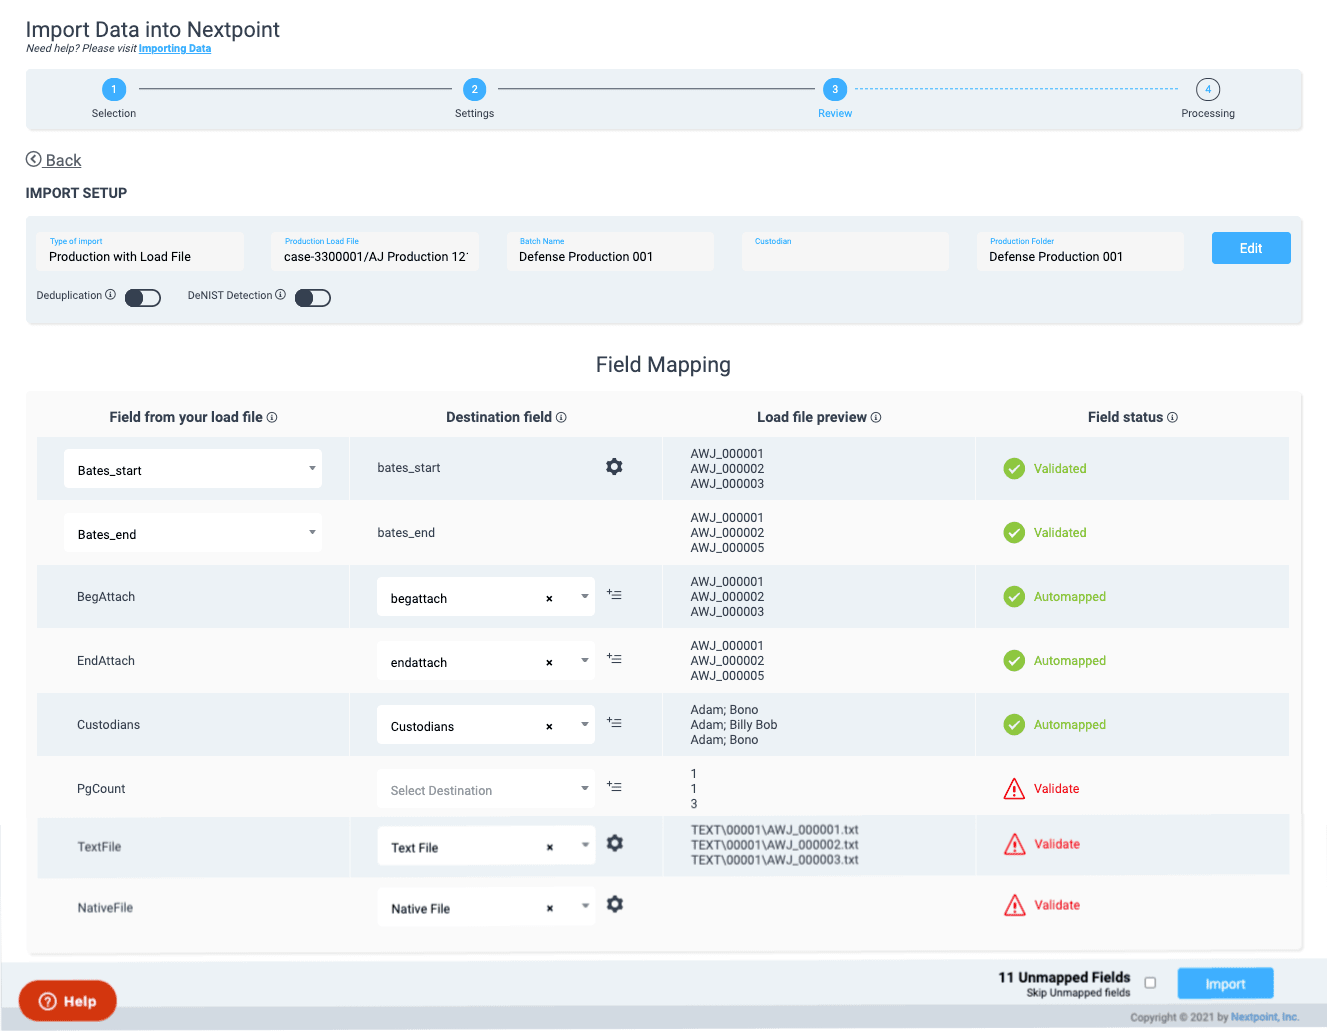
Over time, it has become very apparent that load files are all a little bit different, require jumping around between different applications to get fields appropriately named for import, and can be down-right complicated. Knowing this, we set out to simplify the process of taking a load file received from a producing party and mapping the data to fields within your Nextpoint database. The obvious solution was a mapper which reads your DAT or CSV load file, lists the fields contained within, and allows you to select the Nextpoint database fields to which the data should be mapped during import. Additionally, we included validation points aimed to improve import success rates and identify potential issues sooner rather than later.
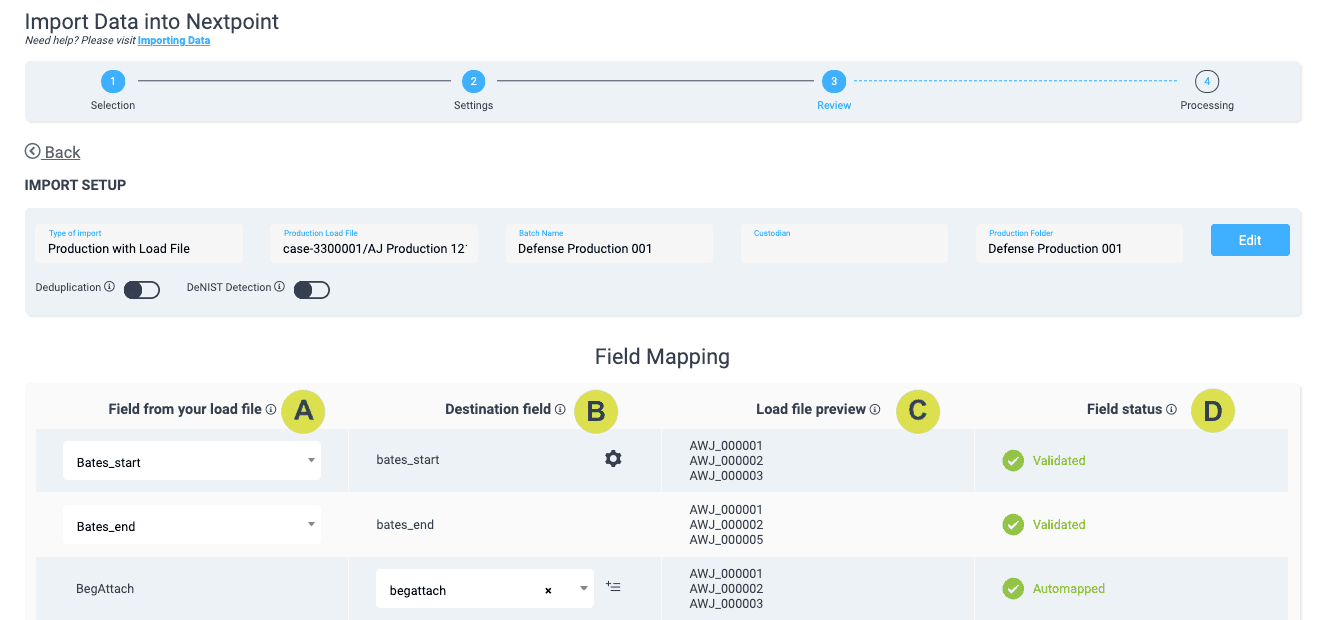
To get started using the load file mapper, first make sure you have selected a production data set in Step 1 of the guided import workflow and verified your Import Data Settings in Step 2. Once in Step 3, you will see verification of your import data settings at the top of your screen, and the field mapping interface below.

There are four key elements to the field mapping interface:
A. Field from your load file: A list of the fields contained in the header row of your selected load file.
B. Destination field: The database field to which corresponding load file field data will be mapped. Nextpoint will attempt to auto map exact matches, but you can also edit recommendations or create a new destination field within the field drop-down.
C. Load file preview: Preview the first 3 rows of data for each load file field for added assurance you are mapping to the appropriate destination field.
D. Field status: Confirmation if load file field has been successfully mapped to destination field or if additional user action is required prior to import.
Setting the Stage for What is Next
We are beyond thrilled to release this to our user community and look forward to hearing your feedback as you start to import!
Questions? Feedback? Please contact our team at support@nextpoint.com.
To learn everything about these new functionalities and how to maximize its potential, check out our Nextpoint Help Center article on the Guided Import Workflow.


